Creatures
Palmon: Survival has 311 creatures in total. This guide covers 41 creatures with official names and portrait art.
Each creature page shows their role, strengths, matchups, and portrait variants. Use the table below to compare creatures by role, or click any creature to dive deeper.
Using the Comparison Table
The table below is your quick reference for creature matchups and team building. Role describes what this creature does in battle (Attacker, Defender, Support). Best For shows what this creature counters or excels against.
Remember: role is a guide, not a straitjacket. A lower-tier creature can carry you if it fills your team’s gap. Trust your playstyle.
Team Building Fundamentals
Type Synergy: Water beats Fire, Fire beats Earth, Earth beats Electric, Electric beats Water. A balanced team has creatures from all four types.
Role Distribution: Build teams with 1–2 Attackers (high damage, lower durability), 1–2 Defenders (tank the hits), and 1–2 Support creatures (heal, buff, control enemies).
Evolution Matters: When a creature evolves, its stats jump massively—often 50–100% more HP and damage. Evolution is worth the investment. See individual creature pages for evolution outcomes.
Position in Formation: Frontline creatures tank. Midline creatures deal damage and control. Backline creatures heal and buff. Build your squad to fill all three roles.
F2P Progression Path
Early Game (First 5 levels): Start with Platyputz or another common starter. Capture Water and Fire types to cover matchups. Don’t stress tiers—just build element balance.
Mid Game (Levels 5–20): Evolve early creatures (Platyputz, Ninjump) and capture mid-tier creatures (Ninjump, Bufonobi, Dolphriend). Mix roles: grab a tank, a damage dealer, and a support unit.
Late Game (Levels 20+): Focus on S- and A-tier creatures, especially ones with strong evolution outcomes. Your evolved team will outpace raw tier numbers.
Roster
| Creature | Role | Best For | |
|---|---|---|---|
 | Graffitty | Utility Worker / All-Round Support | Early-game content |
 | Squeezel | Fast Attacker / Pure Combat DPS | Support-heavy enemy teams |
 | Flouffant | Area Damage Specialist | Multi-enemy waves |
 | Spinchilla | Tank / Frontline Defender | High-damage physical teams |
 | Emboa | Single-Target Attacker / DPS | Priority single targets |
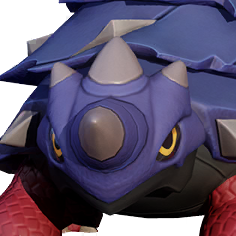 | Auktyke | Electric DPS / Random Targeting Attacker | Back-row heavy teams |
 | Kilohopp | Burst Attacker / Support Hybrid | Boss encounters (high burst damage needed) |
 | Wyvierno | Single-Target DPS / Attacker | High-priority single targets |
 | Meowdame | Melee Specialist / Resource Gatherer | Slowed/immobilized enemy groups |
 | Platyputz | Charge-Type DPS / Control Specialist | Rage-skill dependent teams |
 | Snowkami | Farming Specialist / Utility Attacker | Farming/resource scenarios |
 | Thunderclawd | Furnace Operator / Single-Target Specialist | Priority single-target elimination |
 | Terrastudo | Tank / Water Combat Support | Groups benefiting from crowd control |
 | Incineraptor | Strong Damage Dealer | Content where evolution is available |
 | Maximito | Defensive Support | High-damage enemy formations |
 | Bruiseberry | Watering Specialist / Early Game Unit | Early-game watering operations |
 | Lendanear | Smelting Specialist / Hybrid Worker | Furnace/smelting operations |
 | Rotorlotor | Back-Row Burst Specialist | Back-row heavy teams |
 | Cerverdant | Watering Specialist / Early Support | Early-game watering operations |
 | Vulcanid | Watering Specialist | Watering operations |
 | Herculeaf | Logging Specialist | Logging operations |
 | Voltbolt | Hybrid AoE / Furnace Operations | Multi-enemy waves with moderate threat level |
 | Axollium | Secondary Tank / Mining Specialist | Multi-enemy scenarios requiring tanking |
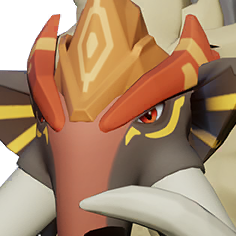 | Barkplug | Mid-Range Attacker / Power Generation | Mid-range combat scenarios |
 | Ninjump | Team Support / Utility | Teams requiring utility synergies |
 | Lucidina | Team Support / Utility | Teams needing utility coordination |
 | Mantleray | Earth Support / Guardian | Teams requiring Earth-type synergy |
 | Ghillant | Support Healer / Debuffer | High-damage dealers needing sustain |
 | Dolphriend | Sawing Specialist / Early Game Unit | Early-game wood processing operations |
 | Abuzzinian | Mining Specialist / Early Game Unit | Early-game mining operations |
 | Statchew | Planting Specialist / Early Game Unit | Early-game planting operations |
 | Blazeal | Early Game Unit | Early-game content only |
 | Baboom | Sawing Specialist / Early Game Unit | Early-game sawing operations |
 | Magmolin | Early Game Unit | Early-game content only |
 | Surveilynx | Charging Specialist | Early-game charging operations |
 | Fingenue | Smelting Specialist | Early smelting operations |
 | Woozard | Watering Specialist | Watering operations |
 | Salamantis | Early Game Unit | Early-game only |
 | Fulgairy | Evolved Fast Attacker / Main DPS | End-game content |
 | Hoofrit | Evolved Tank / Support | End-game tank scenarios |
 | Limudroid | Evolved Electric DPS | End-game electric teams |
Next Steps
Click any creature above to see its full strategy guide. Check out Guides for team-building depth, economy tips, and endgame strategies. See Community Data for tier lists and player observations from independent sources.